Tuesday, September 10, 2013

It Started with a Plant


I love making jewelry and have been doing it for 11 years. My style has evolved with time and changes with my moods. I really truly enjoy exploring unique color combinations. I take my inspiration from everything I see, from nature, scrapbook paper, lining up nail polish bottles (which I'm obsessed with and might have a problem with) to checking out Pinterest. 

So, from time to time I'm going to show you where I get my inspiration for specific pieces of jewelry. Eventually, I'll leave the link for my soon-to-open Etsy shop, and if you're interested you can purchase the jewelry there.

For this bracelet I pretty much had two inspirations for it. Mainly one inspired the other which paved the way for the third, the bracelet. 


The first one was at the beginning of the summer I became obsessed with a lime and purple color combination for my annual pots. In this pot there are three plants, two Coleus and a Petunia. I did not save the Petunia tag, so I'm not sure what it's called, but Fishnet Stockings and Gays Delight are the Coleus. In the photo you can barely see the Fishnet Stockings, it's in the top right corner. If you're close to Fort Wayne, you can pick up all three plants from Stuckey's Greenhouse on Tyler.


This is the second one that helped play a part in the creation of the bracelet. I had just discovered the joy of scrapbook paper (I know, I'm super late to the party) and wanted to do something with the Pretty as a Peacock paper I had picked up at Michael's for 50% off. I decided to dust off my dormant craft skills and bust out the Mod Podge for a super fast and simple canvas wall art project for my daughter's bedroom, and purple is her favorite color right now. 

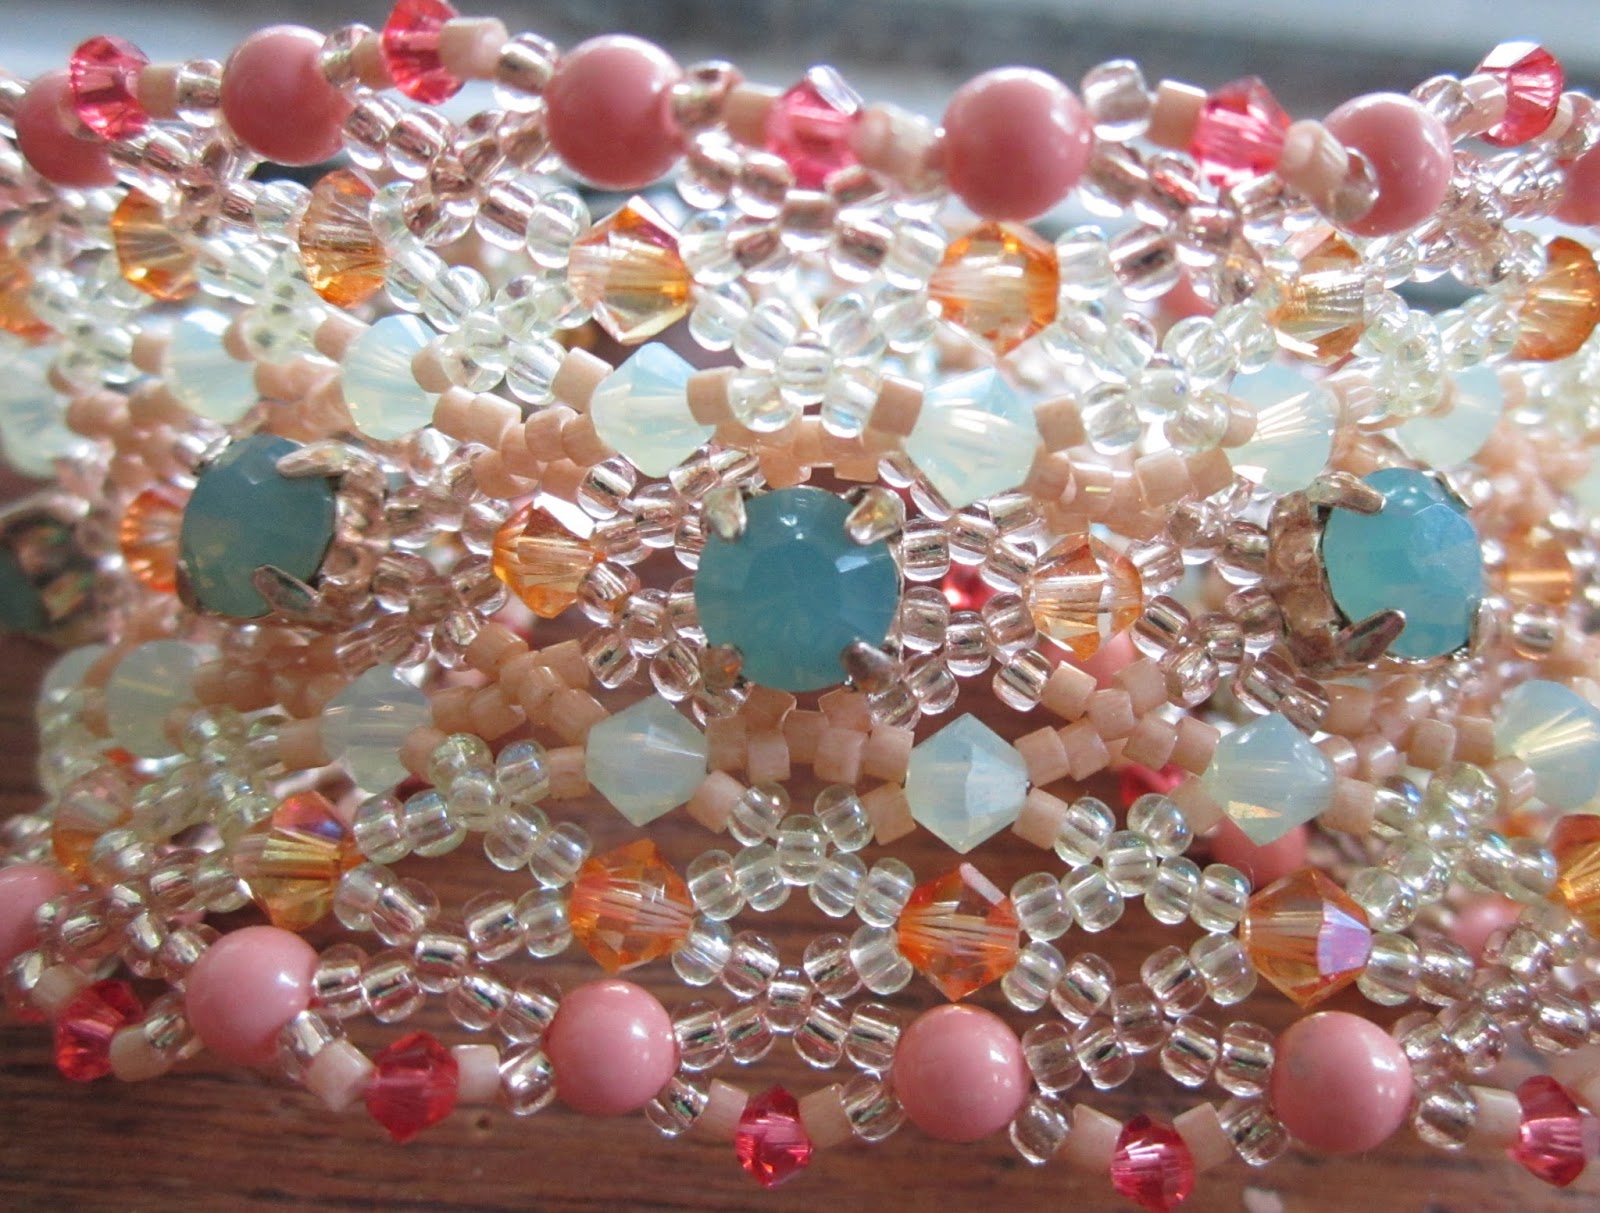
Both of these, the plants and the peacock with their gorgeous color combinations stuck in my head and I couldn't stop thinking about them. That's when my peacock bracelet was born. From the teal and lavender seed beads, and lime green drops to the iridescent tile like beads, and crystals which flash different colors in the light, I feel it's a good representation of a peacock's feathers.

Here is the bracelet again, can you see the idea behind it? 


The TV show I was watching while making this bracelet was Lost Girl.

How about you, is there any place you like to take your inspiration from? Is there a certain color combination you just can't get out of your head? Let me know in the comments section.


Monday, September 9, 2013

In the Trenches With a Preteen


This must be a week of writing about things that I wasn't planning on writing about. I never had any plans for writing about parenting, but sometimes you just have to. I have a daughter who is firmly in the grasp of the preteen bracket in her life, so for her things are stressful and responsibility has grown by leaps and bounds. Which leads me to knowing there is not much I can do besides help ease her load, and just be there for her while she is transitioning. Even when she doesn't want me to be there, especially when she doesn't want me.

The thing about this is, I remember her as a baby like it was yesterday.  My first niece was born a couple of days ago and you better believe my daughter and I have spent as much time with her as possible. My sister is 12 years younger than me and I took care of her a lot. I became extremely protective of her just like she was mine. I have a feeling my daughter is going to be the same way with her new cousin. I already feel that same protectiveness for my niece that I felt for her mom (and my own daughter).

So, yesterday my sister, daughter and I were hanging out in her hospital room and I was holding the baby when the nurse came in to collect blood from my niece. If I would have known what the nurse was actually going to do I might have had the nurse wait until my mom had came back and handed her off to grandma. See, 11 years ago when I had my own daughter all of the heal pricking tests were not done in front of me, which is exactly the way it should be. No new mother wants to see their baby hurt while they sit there and watch, trust me there is plenty of instances where that will happen later. In fact, in the preteen times it happens a lot.

Well, it came down to me to hold her while the nurse pricked her heal and squeezed the ever living crap out of my niece's foot. What was even more crappy was the way I had to hold her, which was her back to my chest. That is not a comforting way to hold a baby at all! She took it like a champ and only screamed when the nurse was actually squeezing, which was six (long) times. Seriously, it felt like she was squeezing her for hours! When she stopped each time, the baby quit crying. Man, that crying was not the pissed off crying of changing her diaper. It was the, I'm hurt cry, the one every mother in the world feels in their chest. The one you carry with you for a while.

You might not even have to be a mother to feel it because I looked over at my daughter and she was crying along with my sister. I was straight up horrified and slightly shocked. The only thing I could do was hold her close to my face with skin to skin contact and babel in her ear. While we are all standing there like, what the hell just happened?! My niece is like, sweet, it's over, I'm going back to sleep, like Nothing. Ever. Happened. I gave her back to my sister and had to get out of there. I think we spent 10 more minutes visiting and drove home in a shocked silence where my daughter actually fell asleep for a few minutes.

Having a new baby around I can't help think of how it was when my daughter was small and how easy it was. Don't get me wrong, it is NOT easy to a new mother, but trust me when you have a preteen you'll look back and remember when you could hold them and their hurt and pain went away. I feel like at this point in our lives I spend a lot of time just being there for her and making sure in whatever way possible that my daughter lets me in. A lot of times she gets mad at me for asking so many questions, but it's my job to stay relevant to her. When she is hurt and mad, even when it's at us, I give her some space to think, then go and talk with her. There are very few times now that I can hold her and make the hurt and pain go away, but I'll still try with everything I have.
   

I don't get to see this girls as much as I'd like to, the one who would try anything to make me laugh, but sometimes she comes out to play and all is right with the world.
Does this sound familiar to any of you parents out there? I'd really like to hear your take on it, and/or any advice for a first time mom of a preteen?

Friday, September 6, 2013

Spoon Pendants

For this blog I really wasn't planning on writing about other people's work, but I just love this lady's spoon pendants so much I think everyone should know about them!
That's Erin from Sunshyne Silverwear  with my daughter, at this year's All Good Music Festival. Erin is out of New York and you can find her hitting the craft and festival circuits. I had the opportunity to meet her at last year's All Good, where I picked up this beautiful necklace.

The moon on the top left of the pendant glows in the dark. I had a hard time picking just one. She also has a big selection of pressed flower pendants. And, if you know anything about me, you know I love flowers. 

Last year out daughter picked a necklace from another vendor and was bummed she couldn't get one. She talked about it all year! Well, when we found out we were going back this year the first thing out of both of our mouths was, "Spoon Pendants!" Yep, a new tradition was born. 

This fuchsia pendant is what I picked up this year. I was so excited because I totally wanted to buy it last year, but picked up the other one instead. I was incredibly lucky it was there. Apparently, it was meant to be mine!
There was another one that I had my eye on. I'm still thinking about this one because the colors in it match this bracelet. And come on it has a hummingbird on it, love!

My daughter picked out a soup spoon. Check out the moon on the top left of the pendant, it's a sun that glows in the dark, so at night it becomes the moon!

Erin is truly a nice and patient lady. I know lat year I talked with her for a while. Also, both years I've been at her both it's been over 90 degrees without a cloud in the sky. She was still there smiling and talking with customers. She even indulged my daughter by looking through many different pendants which were not out on display.

Her prices are great, the hummingbird pendant is $25. If that's too much, the spoon handle pendants are $15. The flattened one like the photo below is around $60. The filled spoon pendants come with cotton and lace cord which for me has held up just fine. There is really a price point for any budget. They are great for unique gifts. Oh and the best part, she gives discounts for spoons you send to her. Check it out here.


Here is our collection thus far, can't wait to add to it. Our pendants are a way of remembering our fun times at All Good Festival throughout the year.


Wednesday, July 17, 2013

Letters and Canvas

I'm having a hard time moving around today, so I decided to just go ahead and post this super easy project. We are heading to Ohio with the whole family to enjoy four days of camping and amazing music at All Good Festival. Did I mention it's going to be hovering around 90 degrees? No? Well, it's worth it and we will be covering lots of ground walking and I couldn't be more excited! So, while I'm letting my body take a break you get to read about this simple and cheap project. 


   What you'll need: I got everything I needed for this project at Lowes, Hobby Lobby and my mother in 
                                    law's house (scrapbooking paper)
  • Letters, numbers or what ever you like (letters $1.50)
  • Canvas ($3.00)
  • Oil based spray primer (I used Kilz Odorless)
  • Spray paint (I used Valspar high gloss, white lacquer)
  • Paint, scrapbooking paper (We used what we had lying around)
  • Painters tape (We used Frog Tape)
  • Spray multipurpose adhesive (I used 3M Super 77)
  • Liquid nails
 Optional- I didn't use these products, but really wish I had!
  • Wood filler 
  • Sandpaper

First I spray primed the letters with two coats of Kilz. This is where I screwed up. I really should have used the wood filler because there are little holes in the T. I know you can't see them in the picture, but they are there and you can see them when looking at the letter in person. I also should have used sandpaper and sanded them to make them smooth as glass. Oh well, next time!

I was also in the process of changing some of my picture frames, so I just did it at the same time. A quick word about the spray primer. I am a very messy spray painter and I got it all over my feet and hands! So, do it outside in a place where your neighbors won't freak out! The picture above is where I used two coats of the lacquer on the letters and the canvas. The lacquer was super stinky, so it definitely should be used outside!
Here is what the letters and canvas looked like all glossy white. You could just leave them like this and call it done, for modern look. I like it so much I'm thinking of doing it for the back of the bathroom door and adding a hook under each of our initials for towels.
For the B, our daughter used the painter's tape and taped out her design. To get the nice lines without removing some of the paint, just pull the tape as soon as you do your last coat of paint.
There's our daughter, Baylee hard at work. Actually, she's ignoring me taking pictures of her painting. Don't you just love the purple hair? It's purple for her summer swim team. Don't worry grandma, it washes out... eventually!
 
Here's the final project. For the E, I used painter's tape for the pattern. For the T, I simply flipped the canvas upside down on the scrapbooking  paper and traced away. I then took it outside, sprayed the adhesive on the canvas and put the paper on top of it. The next morning I put the liquid nails on the back of the letters and positioned them on top of the canvas and snapped the picture. That's why they are laying flat and not hung. The liquid nails package said to wait 16 hours before hanging. The only things I needed to buy were the letters and the canvas and it came to a whopping $4.50 a piece. Super easy and cheap, new wall art!

We will be welcoming a new niece very soon and I see another project like this in the near future with a J on it. Or a larger canvas with her whole name!

If anyone else has done this project, I'd love to see your interpretation!

Monday, July 15, 2013

About Me


   I'm a Midwest mother of a wonderful daughter and her dad and I have been together for 13 years. I've been making jewelry for over ten years and still get excited about different color combinations. The same can be said for the way I garden. I love changing it up every year with different plant colors.
   
    I just graduated with an undergrad in communication and have found I finally have time to completely redo pretty much everything in my house. I am super excited about this. I am trying to take as many before pictures as I can. I have already made some mistakes and will post those too. Hopefully, someone else can read my mess ups and learn from it!